
We’ve all been there. You’re thirty pages into a captivating novel, your tea is perfectly steeped, and the cat has finally settled on your lap. Then life happens—the doorbell rings, or you realize you forgot to eat dinner. You slam the book shut, and ten minutes later, you’re staring at the page, desperately trying to remember where you left off. We’ve all used a receipt, a random piece of mail, or—in my darkest moment—a slightly greasy pizza box as a placeholder. It’s time we treated ourselves better.
I’m a firm believer that your bookmark should be just as awesome as the story you’re diving into. It’s a tiny accessory that says, “I have great taste, and I respect the written word enough not to dog-ear it.” So, I’ve rounded up 8 DIY aesthetic bookmarks that are ridiculously easy to make. They’re perfect for a crafty afternoon, they make incredible gifts, and best of all, they’ll banish those pizza box stains from your favorite books for good. Let’s get crafting!
1. Pressed Flower Bookmarks
There’s something so magical about preserving a little piece of the outdoors and tucking it inside your book. These bookmarks look incredibly delicate and fancy, but I promise you, they’re one of the simplest projects on this list. It’s like creating your own little piece of botanical art.
What You’ll Need
- Dried/Pressed Flowers: You can buy these in bulk online (super easy!), or you can DIY them by pressing small flowers and leaves from your garden inside a heavy book for a week or two. I like using tiny pansies, ferns, and bachelor buttons.
- Adhesive: Mod Podge is my go-to here. It acts as both a glue and a sealant.
- Paintbrush: A cheap foam brush works perfectly.
- Cardstock or Thick Paper: Something with a little weight to it so the bookmark feels substantial.
- Hole Punch & Ribbon/Twine (optional): For that classic finishing touch.
Let’s Make It!
- First, cut your cardstock to your desired bookmark size. I usually go for about 2 inches wide and 6-7 inches tall.
- Apply a very thin layer of Mod Podge to the front of the cardstock. Don’t go overboard, or your paper will get soggy.
- Carefully arrange your pressed flowers on the wet glue. This is the fun part! Play around with the design. Once you’re happy, gently press them down.
- Let that dry completely for about 15-20 minutes.
- Now, apply another thin layer of Mod Podge over the top of the flowers and the cardstock. This seals everything in and gives it a nice, slightly glossy finish.
- Once that’s fully dry, punch a hole at the top and thread a piece of ribbon or twine through it.
Pro-Tip: I once tried to rush the drying process with a hairdryer. Let’s just say my delicate flowers went on a little adventure around the room. Patience is a virtue, my friend. 😉
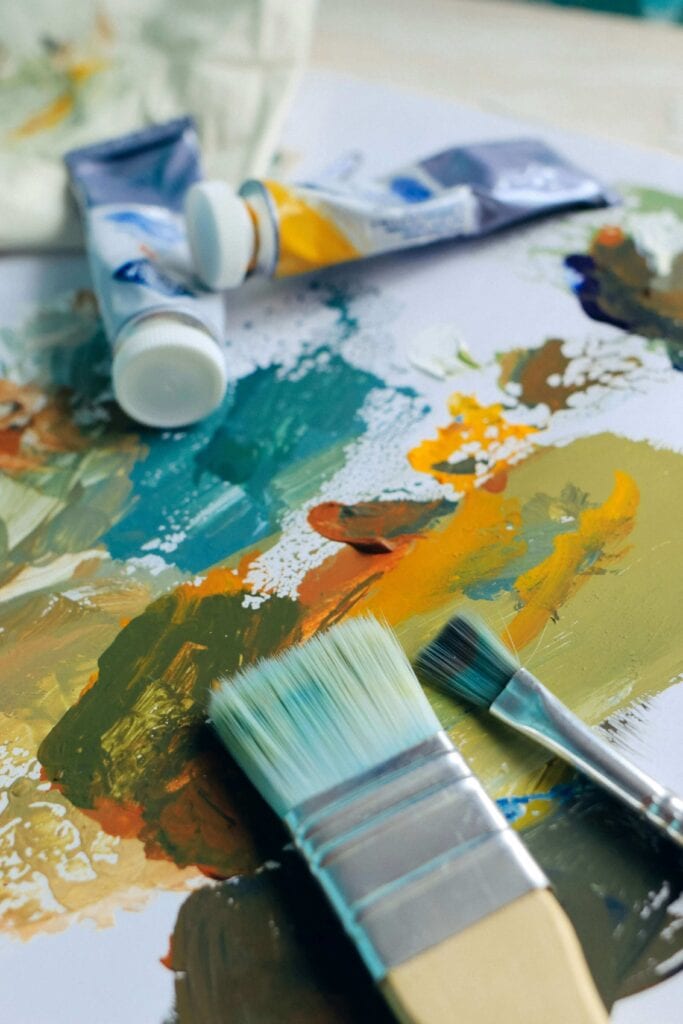
2. Watercolor Bookmarks
You don’t need to be the next Bob Ross to make these look amazing. In fact, the less you try to control them, the better they turn out. These bookmarks have that effortless, artsy vibe that looks way more expensive than it actually is.
The “Just Go For It” Method
- Materials: Watercolor paper (this is key—regular paper will just pill and fall apart), a watercolor set, a brush, and a cup of clean water.
- The Process:
- Cut your watercolor paper to size. Because it’s thicker, you might only want to cut one or two sheets at a time.
- Wet your brush and pick up a color. Then, just let loose! Try a simple ombré effect by painting one solid color at the top and using a damp, clean brush to pull the color down.
- For a more advanced look, try the “wet-on-wet” technique. Get your bookmark totally wet with clean water, then drop blobs of color onto it. Watch the paint dance and bloom across the page—it’s pure magic.
- While the paint is still damp, you can sprinkle a little coarse salt on it. It creates a cool, crystal-like texture. Just brush the salt off once it’s dry.
- After the paint dries, you can stamp a quote on it or just leave it as a beautiful abstract piece. IMO, the abstract ones always look the most professional.
3. Tassel & Charm Corner Bookmarks
Origami heart bookmarks are cute, but have you tried these corner bookmarks? They literally slip over the corner of your page, so they never fall out. It’s genius, and they’re so simple to make. Plus, you can jazz them up with tassels and charms to match your current read.
The Origami Fold (It’s Easier Than It Sounds!)
- Start with a square piece of paper (origami paper is perfect, but you can cut any paper into a square). About 6×6 inches is a good size.
- Fold it in half diagonally to make a triangle.
- Fold the two top corners of the triangle down to meet the bottom point. This makes a diamond shape.
- Unfold those two corners back up. Now, fold just the top layer of the bottom point up to meet the top edge of the triangle.
- Take the right corner and tuck it into the little pocket you just created. Do the same with the left corner. You’ve made the base pocket!
- Now for the fun part: decorate! Glue on some googly eyes, use decorative scrapbook paper, or—my favorite—punch a hole through the top layer and attach a store-bought or DIY tassel with a jump ring.
Why do I love these? They grip the page so well. I read a lot on the go, and these are the only bookmarks that survive the chaos of my bag without getting bent or lost.
4. Embroidery Floss Tassel Bookmarks
Sometimes, the simplest bookmark is just a beautiful piece of string. But we’re not talking about any old string. We’re talking about a lush, custom-made tassel that hangs elegantly from your book. It’s a classic look that pairs perfectly with a leather-bound journal or a vintage hardcover.
Let’s Talk Tassels
- Materials: Embroidery floss in any color you like, a piece of cardboard (or even your phone), scissors.
- The Process:
- Wrap the embroidery floss around the width of your cardboard about 30-40 times. The more you wrap, the thicker the tassel.
- Carefully slide the wrapped floss off the cardboard. Cut a separate, 10-inch piece of floss and tie it tightly around the top of the looped bundle.
- Cut through the loops at the bottom.
- Take another piece of floss and wrap it tightly around the bundle, about half an inch down from the top knot. Tie it off and hide the ends inside the tassel.
- Trim the bottom to make it perfectly even.
- The Finishing Touch: Instead of attaching this to a paper bookmark, simply attach a small jump ring to the top knot, and clip it onto a piece of ribbon or a thin leather cord. The cord is your actual bookmark, and the tassel is the beautiful decoration that hangs out the bottom. It’s simple, elegant, and ridiculously satisfying to fidget with while you read. 🙂
5. Faux Leather Stamped Bookmarks
Want to feel like a fancy artisan? Faux leather is your new best friend. It’s forgiving, it’s cheap, and it takes stamping beautifully. These bookmarks look like they cost fifteen bucks at a boutique, but you can make a set of five for under five dollars.
Getting That Premium Feel
- Materials: Sheets of faux leather (you can find packs on Amazon or at craft stores), a bone folder (optional, for sharp creases), rubber stamps with letters or designs, a stamp pad (permanent ink works best), and an X-Acto knife.
- The Steps:
- Cut your faux leather into rectangles. I like to round the corners with scissors for a softer look.
- Pro-Tip: If you want a nice, sharp center crease so the bookmark lays flat, use a ruler and a bone folder to score a light line down the middle.
- Now for the stamping. This is where you get to add your personality. Stamp a single word like “READ,” “DREAM,” or “ADVENTURE.” Or, stamp your favorite literary quote.
- Let the ink dry completely. FYI, some inks can smudge on faux leather, so give it a good 15-20 minutes before you handle it.
My Honest Opinion: I love these because they’re virtually indestructible. If you accidentally spill coffee on one, you just wipe it off. Try doing that with a paper bookmark. They’re the SUV of the bookmark world.
6. Washi Tape Bookmarks
If you’re like me, you have a drawer full of beautiful washi tape that you’re “saving for a special project.” Guess what? This is that special project. This craft is so easy and satisfying, and it’s a great way to use up those scraps.
A Rainbow of Possibilities
- Start with a Base: You can use plain cardstock, thick shipping tags, or even old playing cards as a base.
- The Design Phase: Just start layering! Tear pieces of washi tape and stick them diagonally across the base. Overlap them. Use different widths and patterns.
- For a cleaner look, lay strips of tape vertically, right next to each other, covering the entire front of the bookmark. Then, trim the excess tape from the edges.
- The best part about washi tape is that it’s repositionable. Messed up? Just peel it off and try again. No stress, no commitment.
Rhetorical Question: Ever wondered why we buy so much washi tape when we have nothing to do with it? This craft is the answer. We’ve been collecting it for this very moment.
7. Personalized Photo Bookmarks
These are the perfect gift for a friend or a family member, especially if they’re missing someone. They combine the practical with the deeply personal. Every time they open their book, they’re greeted by a happy memory. It’s a total gut-punch in the best way possible. :’)
Making Memories Tangible
- Gather Your Supplies: Print out some wallet-sized photos on matte or glossy photo paper. You’ll also need some heavy cardstock or chipboard for backing, and your trusty glue stick or Mod Podge.
- Assemble:
- Cut your backing to size, making it slightly larger than your photo to create a border. A white or colored border makes the photo pop.
- Glue your photo securely to the backing.
- For ultimate durability, you can laminate these with self-adhesive laminating sheets. It protects the photo from getting bent or damaged.
- Punch a hole in the top and add a ribbon with a small charm that means something to the person—a tiny heart, a musical note, whatever fits.
8. Upcycled Ribbon & Button Bookmarks
This is the ultimate “no-sew” fabric bookmark. It uses things you probably have lying around in a junk drawer or an old sewing kit. It’s rustic, charming, and has a wonderful tactile quality.
The “Found Objects” Craft
- Find Your Ribbon: Look for a piece of grosgrain or satin ribbon, about 10-12 inches long.
- Find Your Button: Dig through that tin of random buttons. Find one with a nice color or an interesting shape.
- The Easiest Assembly Ever:
- Singe the cut ends of the ribbon quickly with a lighter to prevent fraying. (Be careful not to burn your fingers like I did the first time!)
- Simply thread the ribbon through the button’s holes. You can go up through one hole and down through the other.
- Pull it until the button sits in the middle of the ribbon.
- Tie a simple knot or a small bow at the top of the ribbon (above the button) to keep it in place.
- How to Use It: You place the button on the outside of the page you’re on, and the two tails of the ribbon mark your spot inside the book. It’s functional and adorable.
So, there you have it. Eight different ways to make sure you never have to use a grocery receipt as a bookmark again. Whether you’re a watercolor wizard or a washi tape warrior, there’s a project here for you. Grab some supplies, put on a good audiobook, and spend an afternoon crafting some love for your literary adventures. Your books will thank you. Now, I’d love to know—which one are you going to try first? Drop a comment and let me know